A Chilly Yet Charming Weekend Escape in Stanthorpe

When you think of Australia you tend to imagine a hot and sunny climate all year round. Well, there’s actually a lot of places you can go to for a chilly winter escape – even here in the sunshine state of Queensland!

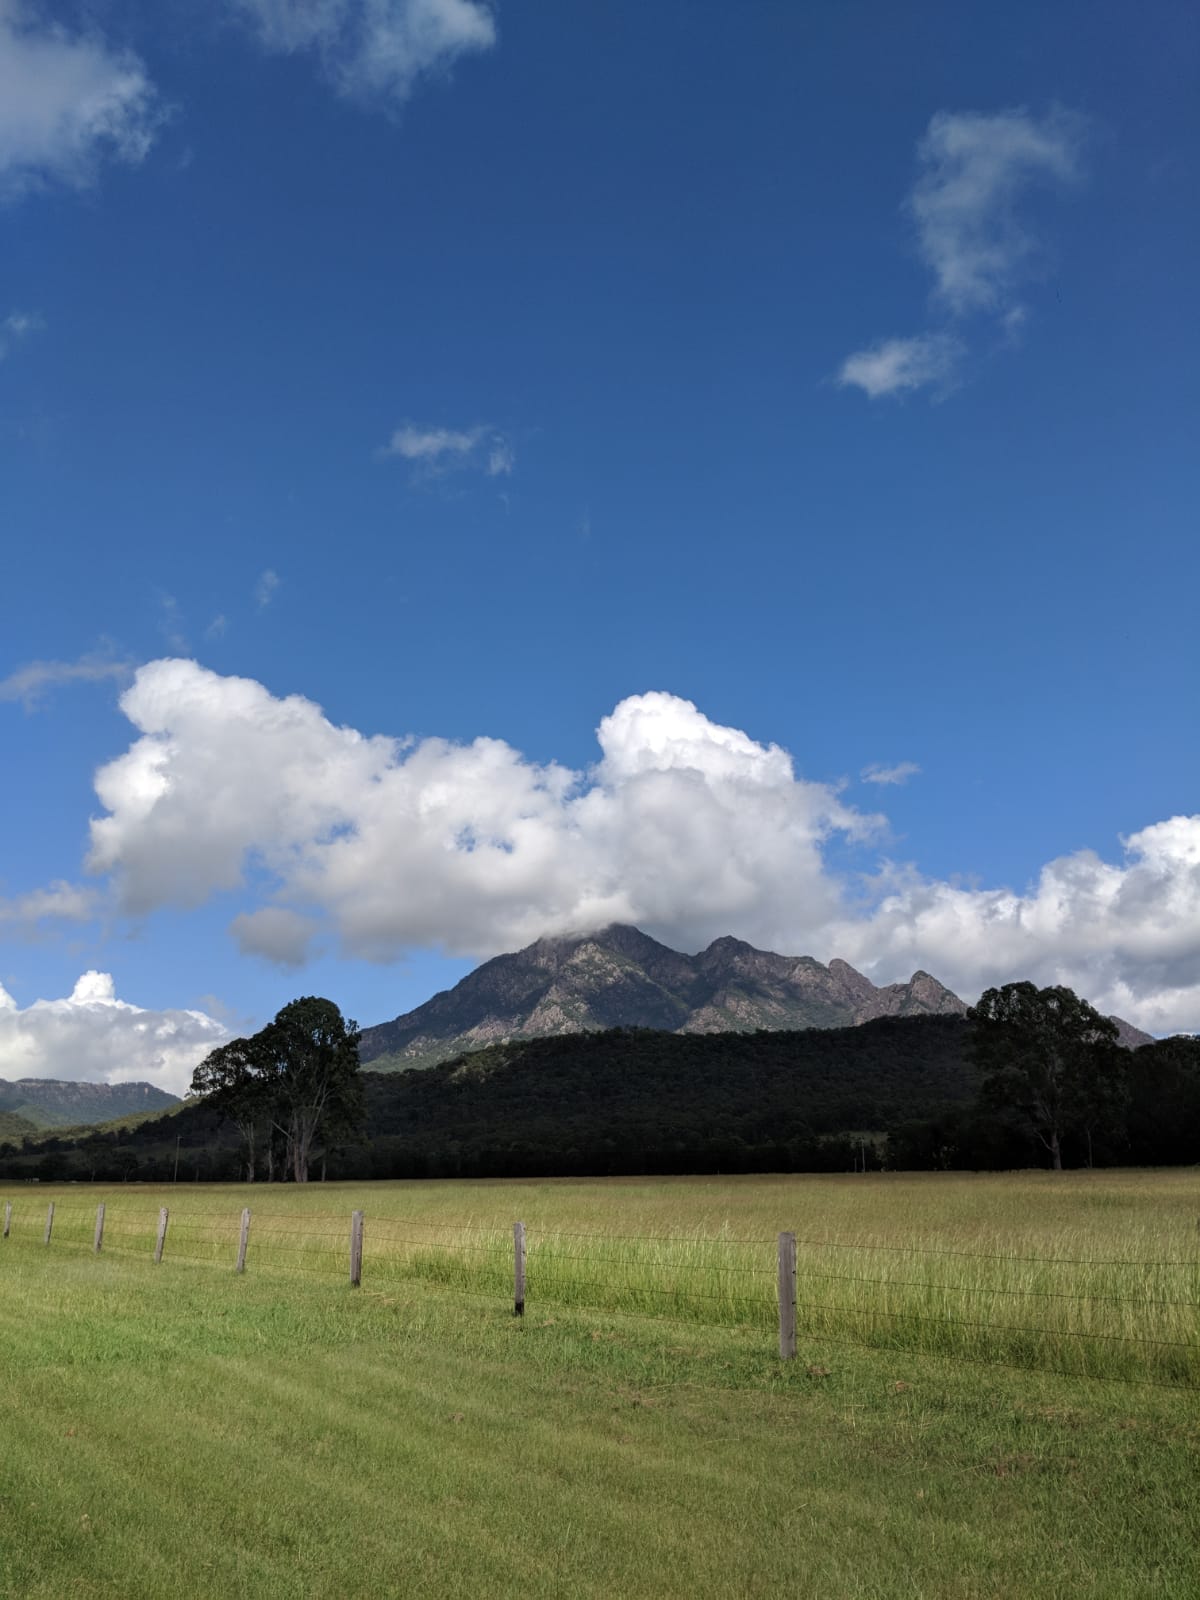
Just a 2 and a half hour drive West of Brisbane, Stanthorpe is nestled in the heart of the Scenic Rim and is the perfect location for a romantic weekend getaway. Situated in the West Moreton region of South East Queensland (inland from the Gold Coast), the Scenic Rim consists of classic country farmlands, breathtaking national parks and quaint towns boasting delicious local produce.

Alure_Stanthorpe
The view from our villa at Alure

We planned our weekend in early June, fully prepared for the cold weather (especially as the week before we arrived they’d had their first snowfall of the year!) but if you fancy something a little extra special, hold out until mid-July when the annual ‘Christmas in July’ occurs throughout the region – a fantastic time for kids.

Deciding that we wanted to splash out and treat ourselves, we booked 2 nights at Alure Stanthorpe in one of their luxurious villas. Check-in wasn’t until 3pm so we decided that we’d get to Stanthorpe, have a wonder around the town and occupy ourselves for  a few hours beforehand.

The drive westwards from Brisbane was certainly picturesque and we arrived in Stanthorpe around lunchtime.  We pulled up into the main street to hunt for some lunch. Searching for ‘gluten-free’ food in Stanthorpe on Google literally pulls up every cafe, which is very inaccurate. In the few cafes I visited, gluten-free simply didn’t exist. We stopped by Zest Pastries hoping to grab a bite but discovered that their gluten-free options were non-existent so I opted for a pot of breakfast tea whilst watching my partner devour a locally made pork and apple cider pie.

Drive_from_Brisbane_to_Stanthorpe
The scenic drive from Brisbane to Stanthorpe

We then drove up to Mount Marley lookout (a short drive from the high street) and walked around the top to take in the views of Stanthorpe and surrounds, and discovered just how chilly it really was! There are more strenuous tracks for those wanting a decent walk but we weren’t in our hiking gear so we just walked around the paved footpath which loops back to the car park.

Mt_Marley_Lookout_Stanthorpe
A bit chilly at Mt Marley Lookout

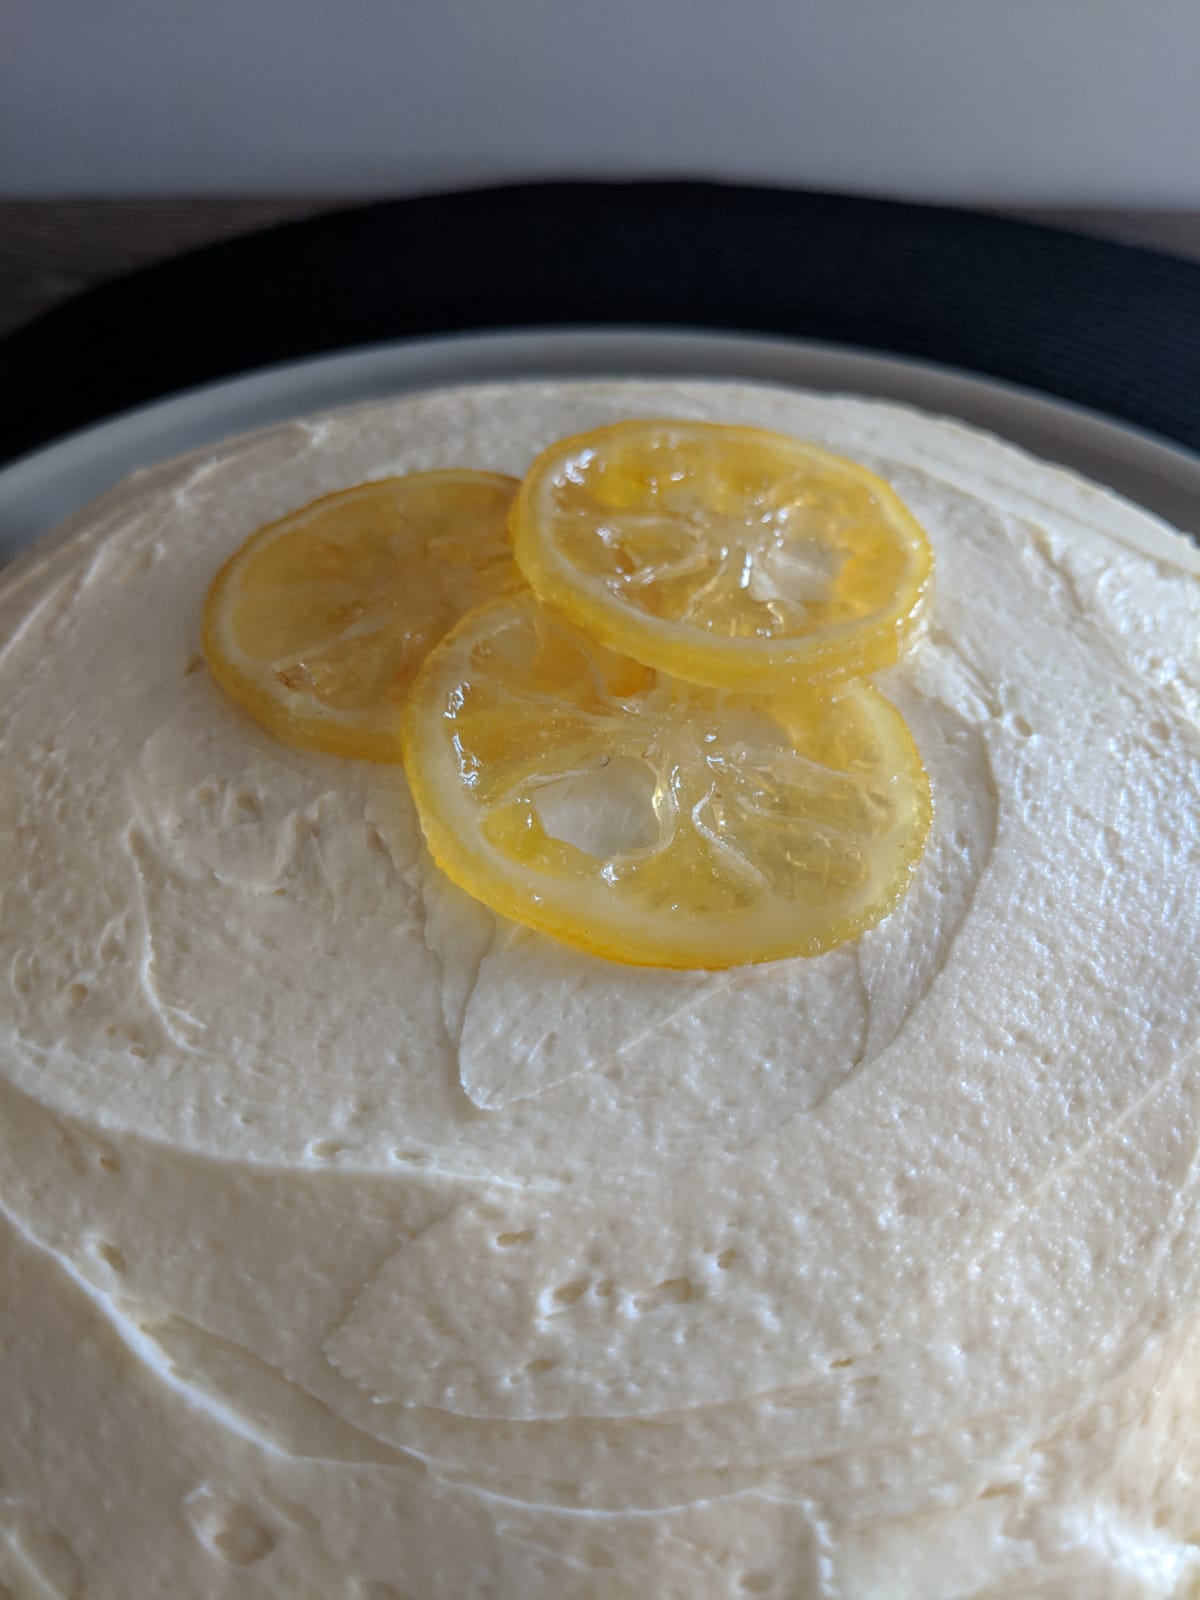
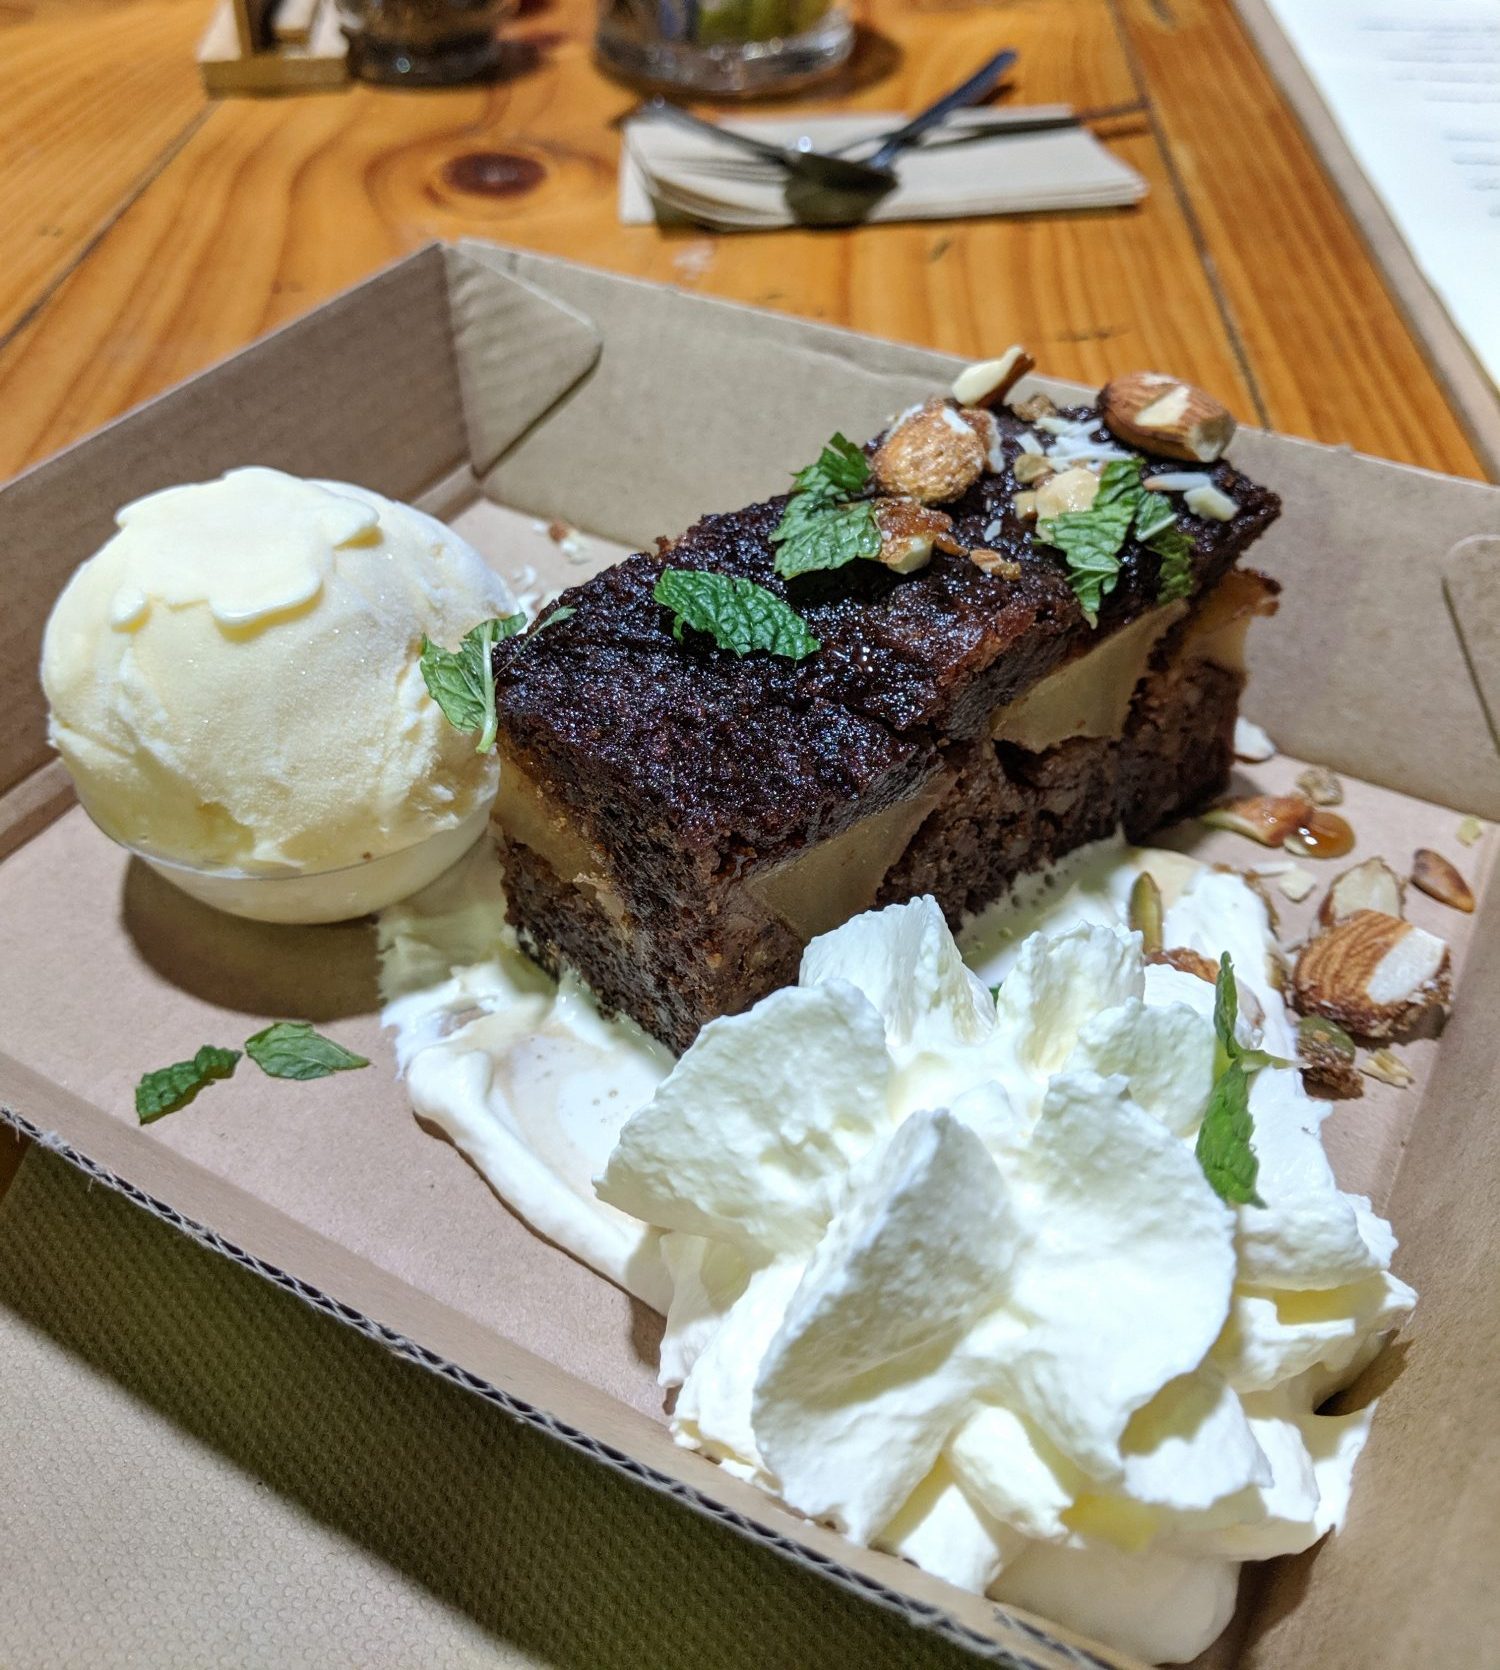
As you drive into Stanthorpe on the New England Highway (coming from Brisbane) you’ll pass a busy junction with several attractions all in one place. Take a left down Halloran Drive to ‘Suttons Juice Factory, Cidery and Cafe’ to learn more about apple juice and cider production and sample some of the incredible food in their cafe. With lots of gluten-free options on hand it was difficult to decide between scones with apple jam or the chocolate beetroot cake – guess which one I opted for!

Stanthorpe_Suttons_Gluten_Free_Chocolate_Beetroot_Cake
Gluten-free Chocolate Beetroot Cake at Suttons

Venture right from the New England Highway and take your pick from the selection of local wineries. In the midst of winter, the grape vines were bare and rather eerie (not to mention the difficulties of growing in the long drought), but in summer you can just imagine the flourishing greenery. We dropped by the infamous ‘Castle Glen’ distillery and found the interiors to be rather dark and rather empty. Maybe it was due to the low season, but we were completely ignored by the single staff member, and as such left empty handed and rather disappointed.

Castle_Glen_Stanthorpe
Castle Glen Distillery

Stanthorpe Cheese proved to be a much livelier (and friendlier!) affair, with the ‘happy-to-help’ cheese experts encouraging our purchase of several smokey and smooth local cheeses, a beetroot chutney and some gluten-free crackers to enjoy them with. There is also the well-known ‘Jersey Girls’ cafe on-site if you wanted to stop by for some food and a warm drink.

Stanthorpe_Cheese
Stanthorpe Cheese is well worth the visit

In the heart of Stanthorpe is the picturesque Quart Pot Creek – a quiet place to walk, spot some local wildlife and have your picture taken next to the big thermometer which is often filmed on TV weather forecasts. Park on Leslie Parade and pop into the information centre (they also sell coffee!) to pick up some maps and get ideas for places to go.

Quart_Pot_Creek_Stanthorpe
Quart Pot Creek and the Big Thermometer

Just before 3pm we drove around 5 minutes south of the town to Alure Stanthorpe, set back off Mt Tully Road. After check-in we drove around the dams and pulled up to our villa, which was bigger than our rental apartment! We were amazed by just how luxurious and secluded the villa was – even though it seemed close to its two neighboring accommodations at first glance.

Alure_Stanthorpe_Villa
Our luxurious Villa at Alure Stanthrope

The huge open living space consisted of a fully-fitted kitchen and coffee machine, dining area, living area with a smart TV and working log fire, the snuggly bed with double electric blanket, large bathroom with L’Occitane toiletries and GHD hair straighteners, and we won’t forget to mention the 4 person hot tub on the private deck outside. There was literally nothing more you could want! We loved our stay here and definitely made the most of the log fire and hot tub! A 2 night stay at Alure Stanthorpe will set you back between $360 – $490 (depending on the season) for either the glamping tent or luxury villa – both with hot tub, self-catering amenities and a continental breakfast hamper (Alure review coming soon!).

Alure_Stanthorpe_Villa
The interior of Villa 1, Alure Stanthorpe

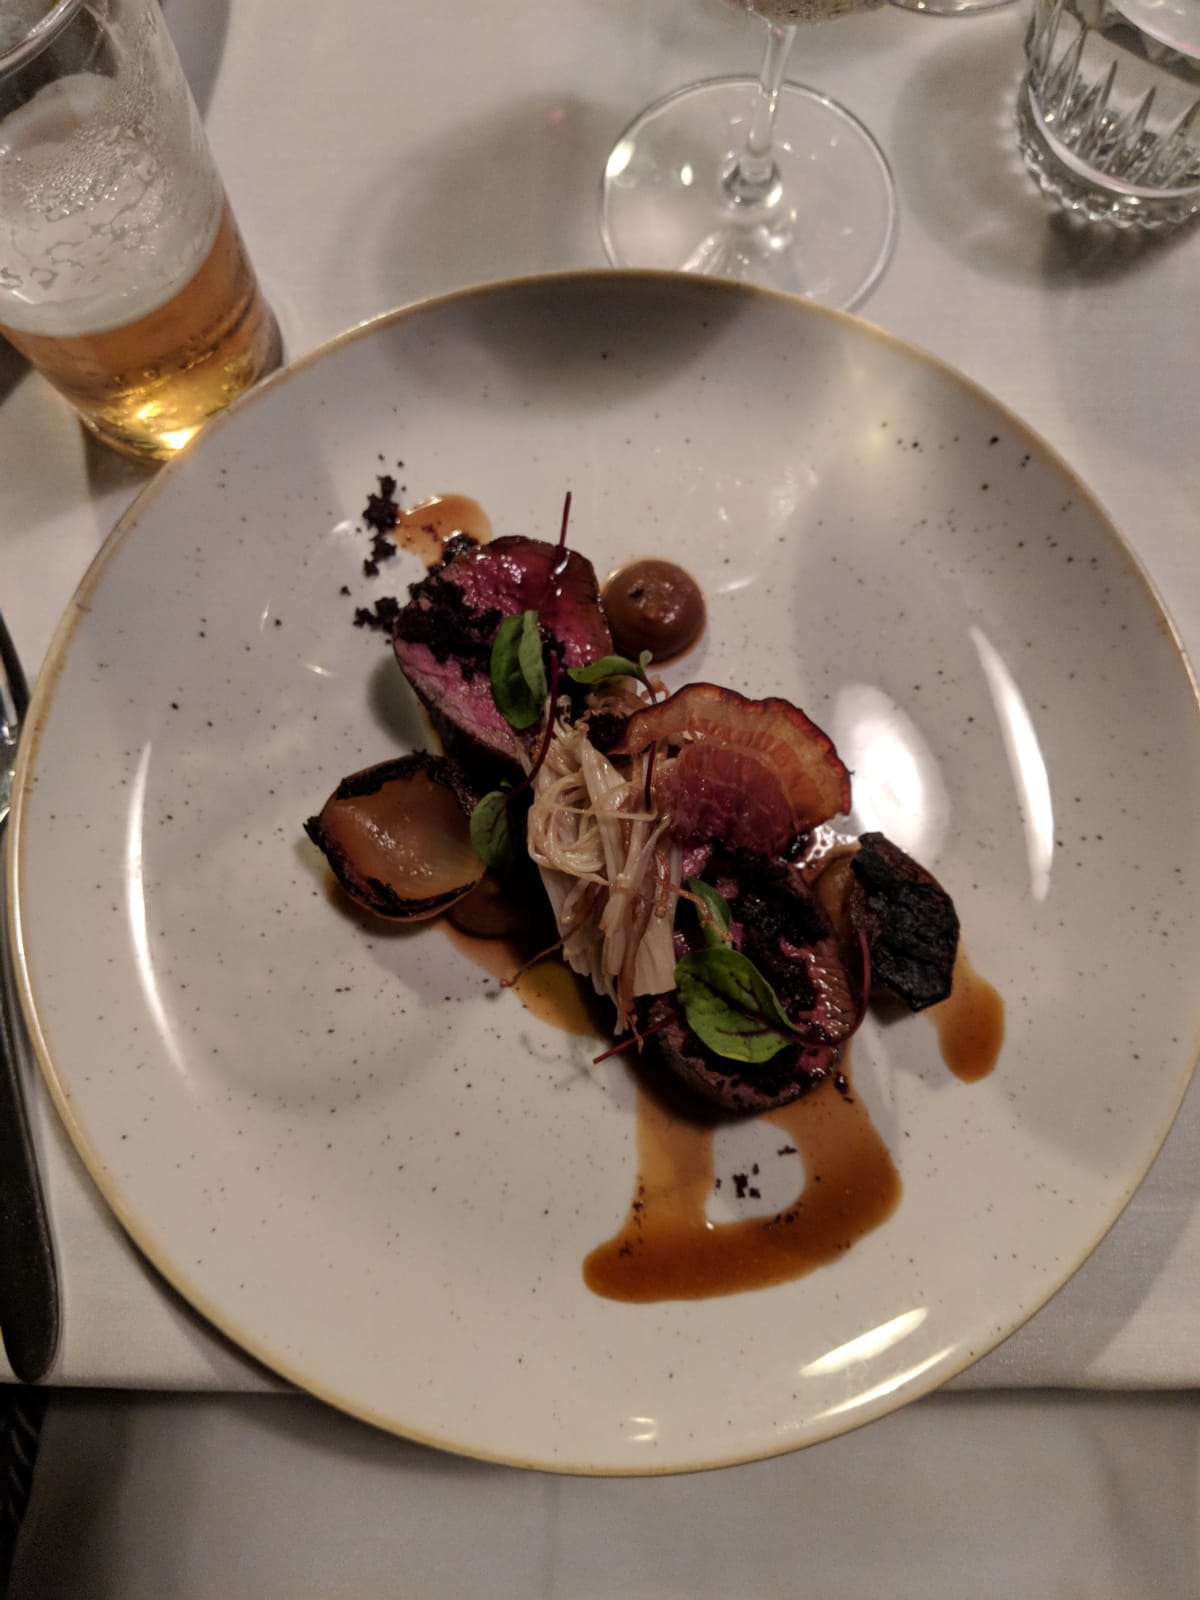
That evening we booked in for a 7pm meal at Varias Restaurant on Caves Road in the town. As part of the Queensland College of Wine Tourism, the award winning restaurant provides real-life experience for students and promotes local food and wines from the surrounding area. The food is a little pricey, but unlike most Brisbane restaurants, the servings were rather generous. With a good choice of gluten-free options and wines available, we enjoyed the delicious food on offer (although we turned up a little over-dressed!) I opted for crispy duck in lettuce leaves, followed by sticky korean chicken strips. I couldn’t even finish my main I was so full, so didn’t make it to desserts. My partner opted for panko crumbed lamb brains followed by sirloin steak, which he advised me was also delicious.

Varias_Korean_Chicken_Gluten_Free
Gluten free Sticky Korean Chicken at Varias Restaurant

When we booked our 2 night stay at Alure Stanthorpe we were offered a ‘Truffle Temptations’ tour for an additional $50, which we locked in for Saturday lunchtime. The tour is only $5 per person, however our package included credit towards some of the products in the store.

The Truffle Discovery Centre is located near to some of the wineries off the New England Highway and the business is in conjunction with Law Dogs Australia. The tour is really just an informative session on truffle growing in Australia with some live action truffle hunting from one of their skillfully trained dogs and the opportunity to taste and purchase some of the truffle infused products available in their small store. It was interesting to hear how the business developed – planting native European trees and coating the roots with truffle spores to encourage truffle growth. The whole process of growth to harvest is lengthy and requires some real patience. In seeing a demand for truffle hunting dogs, Law Dogs Australia began to train it’s dogs specifically to hunt truffles and often hires the dogs out to other truffle growers across the nation when its time to harvest.

Truffle_Discover_Stanthorpe
A big old truffle

The truffle honey and truffle oil are delicious – the honey is a great accompaniment with cheese and the oil is perfect for pasta or risotto.  If you have a bit of extra time on your hands, you can also watch the Law Dogs Australia dog show, showcasing some of the law dogs in action.

As always, we planned a hike for the next day in Girraween National Park, around 45 minutes south of Stanthorpe. We headed for the Pyramid walking track, which takes you into the heart of the park when searched in Google Maps. The road disappeared shortly after entering the park and became a dusty, sandy track, wide enough for one car at best (not suited for city vehicles!) After around 15 minutes you’ll reach a large car park and (unfortunately) there’s minimal signage for the walking tracks so follow other people if you can (there were only 3 cars there when we arrived so we had to figure it out for ourselves).

Girraween_National_Park
Find the trail!

The tracks aren’t well-signed (I was a little disoriented!) but you can eventually find your way by using your senses. The track starts on a flat rocky area (a bit slippy in the rain!) and winds round into the rainforest. From here, the track is much easier to follow towards the Pyramids, but be warned, there’s a LOT of stairs. It took us around 30 minutes to get to the top of the walking track, at which point you’re faced with a steep rocky slope. The rain started to intensify and although we made it half-way, we decided to turn back for fear of losing our grip, but we managed to get a few shots before we headed back down.

Girraween_National_Park
The view from the Pyramid slopes

On the way back, turn off to the right towards the Granite Arch, which is well worth it for the photos! If you’re prepared for a longer hike, there are some larger trails available throughout the park, but remember to always be prepared come rain or shine. Here’s a great summary of some of the most popular trails.

We loved our stay at Stanthorpe and are planning to head back in summer to see a different side to this sleepy winter town.

Planning your trip to Stanthorpe and surrounds and have some questions? Let me know in the comments below.

Happy travels! 🙂

Trekking at Walkabout Creek, Enoggera Reserve

Enoggera just about has it all thanks to its beautiful lake which provides a place to cool off, somewhere to enjoy relaxing water activities and provides stunning scenery from many of the walking tracks surrounding it’s perimeter.

Enoggera_Dam_Reservoir_Boats
You can just spot the kayaks from the other side of the water

With an array of tracks available, we decided to take the Reservoir Break walking track and see where it took us. Taking a right from the main water area (canoe launch area), the walking track begins (and continues on) at a fairly steady pace, providing an even footing for families, runners and couples alike. After a while you’ll come across a junction – the track on the right will loop you back onto the track you just came one, whereas the track on the left will wind you round the remainder of the lake (continuing on the Reservoir Break track).

Enoggera_Dam_Reservoir_Lake
The beginning of the walking track

Now, don’t be fooled by people telling you that the walk around the whole perimeter of the lake is an easy trek. After the junction, the track becomes much more hilly, with incredibly steep climbs followed by the same in descents – not an easy feat in the 30c heat (even at 9am!) The whole loop is said to be just over 11km, taking around 3 hours if walking – but this doesn’t take into account the poor signage and maintenance of the tracks.

Enoggera_Dam_Reservoir_Hills
The hills became pretty steep at some points!

We made it to the dry Enoggera Creek bed, hoping to catch the track which should’ve looped us back the way we came, however we couldn’t find it as there was no signage and it was very overgrown. By this point, we’d been walking for 1hr 15 minutes (taking into account the crazy hills) and we were pretty tired. The guided walking group we’d overtaken earlier had caught up with us (after hearing them saying “this is much more of a hike!”) and had stopped for lunch – clearly more prepared for taking on the whole lake loop than we were!

Enoggera_Creek_Bed
No water in the creek – just a bunch of rocks and no signs!

We decided to head back the way we came – those hills were a killer! Eventually we made it back to the canoe launch area after just over 2.5 hours – dripping in sweat and struggling to keep our legs going! To the creek and back was just over 11km – though it looked a lot shorter than completing the whole loop!

Overall the walk provided some stunning scenery of the lake and was a great opportunity to spot water birds and lizards. If you fancy spending some more time at Enoggera Reserve, we recommend taking some swim wear and a picnic to enjoy more of the lake, especially in the Summer!

Monitor_Lizard_Enoggera_Walkabout_Creek
The monitor lizards can be hard to spot!

There is also a cafe and information centre that’s great for kids, along with the opportunity to hire canoes and paddle boards (or bring your own floaties!)

If you’re planning to walk the full loop of the lake, make sure you’re prepared. Start your walk earlier in the morning before the sun is in full swing and the temperatures rise, make sure you have plenty of water and snacks, mosquito spray, sunscreen, hat and sunglasses. If you don’t have a physical map, make sure your phone is fully charged (as always, I recommend downloading the Maps.Me app or offline Google Maps!)

Hydration_Pack_Hiking_Equipment
My 2L hydration day pack was a bargain from Kmart!

Have you completed the full loop of the lake? How long did it take you? Let us know!

Happy hiking 🙂

Gluten Free Lemon Cake

As much as I’m enjoying experimenting with my low-sugar recipes, sometimes life just calls for a bit more of the white stuff (the legal kind). So I made this lemon cake with normal caster sugar and tried my hand at buttercream frosting using some very clever tips from a few YouTube videos (thank the Lord for the internet!) The result? A light, yet indulgent lemon cake with a tangy, fluffy buttercream to top it all off – perfect with a good English cuppa. I even made some fanciful candied lemons for an extra bit of pizzazz!

Beautiful if I may say so myself!

TIPS: If you want to add the candied lemons, you can make these in your sugar syrup and then use the leftover syrup to drizzle over your cake. I’ve included separate cooking methods just in case you don’t want to add the candied lemon slices to your cake (it is extra effort after all). Either way, the sugar syrup adds an extra bit of moisture and sweetness (especially when it gathers at the bottom of the cake *licks lips*).

INGREDIENTS:
For the cake:
1 cup Gluten Free Self Raising Flour
1 tsp Baking Powder
1 cup Sugar or Natural Sweetener
1 cup Butter
3 Eggs
2 tbsp Milk
1 tsp Vanilla Extract
Zest of 1 Lemon

For the sugar syrup:
Remember to add lemon slices if you want to make candied lemons together with the syrup!
1/2 cup Sugar
Juice of 1 Lemon
Water (add to the lemon juice to make 1/3 cup of liquid)
4 slices of lemon (thinly sliced) if making the candied lemons

For the buttercream:
1/2 cup Butter (room temperature)
2-3 cups Icing Sugar (sifted)
1 tsp Vanilla Extract
1 tsp Milk (optional)

For the candied lemons (optional):
Recipe if you want to make these separately to the sugar syrup!
4 slices of lemon (thinly sliced but thick enough to hold their shape)
1/2 cup Sugar
Juice of 1 lemon
Water (add to the lemon juice to make 1/3 cup of liquid)

METHOD

Perfectly browned in my new cake tin!

CAKE FIRST!
1) Pre-heat the oven to 150 degrees Celsius (for fan ovens).
2) Lightly line your cake tin with a bit of butter or oil.
3) In a separate bowl, whisk together the butter, sugar, vanilla and milk until light and fluffy.
4) Add the eggs in one at a time and combine.
5) Grate in the lemon zest and combine.
6) Sift in the flour and baking powder and combine until you have a smooth batter (add more milk if needed).
7) Pour the batter into the cake tin and bake in the centre of the oven for around 30-40 minutes until nicely brown on top (my oven cooks really quickly!) Leave the cake to cool in the tin whilst you prep your sugar syrup.

Just the right cake batter consistency

SUGAR SYRUP
Reserve a few slices of lemon for the candied lemons if you wish to add them on top!
1) Juice the lemon and add into a small saucepan with the sugar and water.
2) Bring to the boil, shaking the pan every so often to combine.
3) Once the sugar has dissolved, reduce the heat and simmer for a few minutes until a syrup texture has formed (this will become more syrup-like once cooled).
4) Poke holes in your still-warm cake using a skewer (all the way through to the bottom).
5) Carefully pour the syrup all over the top of the cake and leave to cool in the tin.

A glossy syrup finish!

CANDIED LEMON SLICES
Make in the same pan with the sugar syrup to save washing up!
1) Juice the lemon and add into a small saucepan with the sugar and water.
2) Bring to the boil, shaking the pan every so often to combine.
3) Once the sugar has dissolved, reduce the heat and add the lemon slices, making sure they are covered in the liquid and not lying on top of each other.
4) Gently simmer, turning the lemon slices occasionally, for around 15 minutes until the lemon slices have softened and a syrup has formed from the liquid.
5) Remove the lemon slices and place on to a plate to cool and turn sticky (make sure they don’t stick to the surface you’re cooling them on!)
6) Poke holes in your still-warm cake using a skewer (all the way through to the bottom).
7) Carefully pour the remaining syrup from the pan all over the top of the cake and leave to cool in the tin.

Try to cut the slices just thick enough to hold their shape!

BUTTERCREAM
If you want to make a more lemon-y topping, add in some lemon zest!
1) Whisk the butter in a large bowl for at least 5 minutes until fluffy and lighter in colour
(PRO YOUTUBE TIP:  use an electric whisk or stand mixer and beat on high for around 5 minutes to make the butter incredibly light and almost white in colour).
2) Carefully add in the vanilla extract and icing sugar and combine with a spoon before whisking for a further 2 minutes.
3) If your mixture is too stiff, add in a tablespoon of milk, whisk again and test. The icing should be almost like whisked egg whites in texture, soft enough to spread onto your cake but firm enough to hold its shape and not drip everywhere!
4) Once your cake has cooled completely, remove from the tin and spread an even layer of icing on top. Top off with your candied lemon slices or a twirl of lemon zest to impress any tea party.

Cake alllll day long

Delicious indulgence without that heavy, full feeling after a big slice! Lemon cake is perfectly light  and great for morning tea or dessert – and who doesn’t like lemon!

That’s what I call a crumb!

What’s your favourite gluten free cake flavour? Are you more of a fruit-loop or chocoholic?

Happy baking! 🙂

Brisbane Noodle Night Markets: A Coeliac Review

When people ask me why I moved to Brisbane, one thing comes to mind besides the blue skies -there’s always something to do. Even in the middle of winter (a very mild one) there’s a whole heap of festivals, markets and days out to keep everyone occupied until spring arrives.

This week, from 25 July – 5 August, the Brisbane Noodle Night Markets are lighting up the riverside along Southbank. Open from 4pm at weekends and 5pm on weekdays, it’s a great spot to grab some food and watch the sun set over the city skyline. The markets are free entry and cash-free to make queuing easier and quicker, however expect to fight the bustling crowds and wait in line for your top Asian food stall picks.

Brisbane_Noodle_Night_Markets
Lighting up Southbank

Before visiting, I hopped onto the Good Food Month website to check out the stalls and see if there was any information on gluten free dining. There wasn’t. After browsing the individual stall menus, I found just 2 options which stated gluten free and to be honest I was pretty disappointed by the lack of choice. However, I still wanted to experience the foodie atmosphere and allow my non-GF partner to enjoy the sumptuous Asian flavours on offer.

Just a short walk from the Cultural Centre bus station, the smokey sky reflected the mouth watering BBQ aromas which tempted your tastebuds before you entered. Considering it was a Sunday evening, it was pretty busy with food taking 10-15 minutes to churn out.

Noodle_Night_Market_Crowd
The hungry crowds waiting for their orders

I visited the first stall that I found on the website to have gluten free options, Zagyoza – The Home of Gyoza. With no gluten free depicted on their menu board, I asked what GF options were available and was surprised when I was told they had gluten free chicken teriyaki on offer. The website stated they only had pork gluten free gyoza…. hmm. Riled by the taste of BBQ in the air, I trusted the serving staff and ordered 6. When I went to collect, they certainly looked very different from the other gyoza orders and the server asked if I wanted teriyaki sauce on top which was also gluten free (with GF on the squeezy bottle label).

Zagyoza_Gyoza
No Gluten Free options on the sign at Zagyoza

The filling and the sauce were flavorsome, however the gyoza dough was a little thick and stodgy on the bottom. I’ve had a bad experience with dumplings before but tried to put it to the back of my mind and enjoy the first of only 2 options I would be eating that evening. Overall, they weren’t anything worth shouting about – I understand the difficulties with replicating the dough but they still didn’t quite live up to expectations. Also, just 6 gyoza for $12 seemed a bit of a rip off – a common theme experienced throughout the evening!

Gluten_Free_Gyoza
GF Chicken Teriyaki Gyoza at Zagyoza

Wondering around the stalls, I couldn’t see any gluten free options on menu boards or food signs. Considering Brisbane is a pretty GF-forward city, I was both disappointed and a little surprised by the lack of gluten free on offer. Either the food stalls didn’t want to be held liable for sickness, or they simply didn’t see gluten free food as a viable option on their menu. I’m sure others were as disappointed as I was.

My second (and last) option ended my night on a sweet note with a naughty gluten free waffle from Waffeland.

Waffleland_Gluten_Free_Waffles
Not advertised but all GF at Waffleland

All of their menu options were gluten free so I felt it would be a pretty safe (and delicious) choice. As my first taste of waffle, it was pretty darn good. I opted for Bangkok Night – a fresh baked waffle with warm, gooey Nutella and icing sugar, with optional vanilla ice cream on the side. For $14 ($12 + $2 extra for ice cream), I have to say it was the highlight of my evening. With Nutella all over my face and hands, I left the markets with a warm fuzzy feeling (although still a little bit hungry).

Gluten_Free_Waffle
Bangkok Night GF Waffle with warm Nutella

After getting home and eating some gluten free toast to fill the small hole in my stomach, I started to feel very sick, my stomach expanded to maximum capacity and I came to the realisation that the dumpling curse had most likely struck once more. After being very sick, covered in a red heat rash and hives, with a stomach to rival any pregnant woman’s, I went to bed thinking about how much money I’d just regurgitated into the toilet bowl (I won’t include a picture so here’s a nice one of the Brisbane Wheel instead…)

Brisbane_Wheel
The Brisbane Wheel glimmering at night

Morale of the story,  you should probably contact the market organizers or food stalls beforehand to understand exactly what they mean by gluten free. Let’s hope in the near future that markets such as these are a bit clearer with their gluten free options and their dedicated to providing 100% gluten free food for people who rely on their transparency (aka ME!)

Did you visit the Noodle Night Markets? How was your experience? I’d love to hear from you!

Happy reading 🙂

Gluten Free, Low Sugar Choc Chip Peanut Butter Cookies

I hate to admit it, but I’m an emotional eater. Even the slightest bit of stress triggers my sugar cravings. This is one of the main reasons behind experimenting with sugar-free or low-sugar treats – so I don’t have to punish myself or feel incredibly guilty if I do give into the cravings.

I never used to like peanut butter – I mean I still wouldn’t eat it out of the jar – but I’ve used it a lot in Asian-style cooking and decided to try baking with it too. The majority of commercial peanut butters contain a lot of crap – high in sugar, fat and oil. I decided to try a healthier, low sugar option and I found that Mayver’s Smooth Peanut Butter ticked all the boxes. It’s all-natural with no added sugar (only 0.8g of sugar per 1 tablespoon) and dairy, gluten and cholesterol free. PLUS it was the same price as most of the standard peanut butters so it just made sense!

A delicious alternative!

With my low-sugar or sugar-free recipes I replace the sugar with granulated natural sweetener (Natvia is my current preference). I feel that artificial sweeteners are a) too sweet and b) full of weird and wonderful chemicals that I would just rather steer clear of ( I also think they may be linked to many of my stomach issues in the past but we’ll leave that for another day!)

My favourite sugar alternative!

These cookies are super easy to make and bake in around 12-15 minutes. They will come out feeling way too soft, but harden up as they cool.

Boyfriend approved!

INGREDIENTS
3/4 Cup Granulated Nativa (or any granulated sweetener)
1/2 Cup Butter (Melted)
3/4 Cup Peanut Butter (Room Temperature)
1 Egg (Beaten)
1 1/2 Cups Gluten Free Self-Raising Flour Mix (I used Orgran)
1 tsp Vanilla Essence
1 tsp Gluten Free Baking Powder (I used McKenzie’s)
Handful Choc Chips

Mix, divide, roll and bake!

METHOD
1. Preheat oven to 180°C and line baking tray with baking paper.
2. Add melted butter, beaten egg, vanilla essence and Natvia into a bowl and combine.
3. Add in the peanut butter and combine.
4. Sprinkle in the choc chips and mix throughout.
5. Sift in the flour and baking powder and mix well to form a soft dough.
6. Measure out a tablespoon of the dough and roll into a ball.
7. Place the ball onto the baking tray and press down lightly on top.
8. Repeat above until all the dough has been used – placing balls around 3cm apart.
9. Bake in the middle of the oven for around 12-15 minutes until golden brown.
10. Allow to cool before enjoying!

The end result!

Are you a fan of low-sugar or sugar-free baking? Do you feel it has helped you to manage your sugar cravings? I’d love to hear from you!

Happy baking! 🙂

Gluten Free Vanilla Choc Chip Muffins

Prince Harry and Megan Markle’s wedding crept up on me out of nowhere and I realised I just had to celebrate somehow! Even here in Australia we haven’t been able to escape the mass media coverage of this global event (and all its dramas) but it seems the celebrations are a little less sought after on the southern side of the equator.

So, a less extravagant way to celebrate is by baking of course! And who doesn’t like choc chip muffins? I decide on plain vanilla muffins with the choc chips as I wanted to top with some colourful icing, so I didn’t want the muffins to be too sweet (but not too plain either!)

The result after baking (a bit browner than I’d like!)

This recipe should make 10-12 smallish muffins (or large cupcakes) however it depends on how generous you are with the portions and how much of the batter you eat during the baking process (oops).

INGREDIENTS:
1 1/4 Cups Self-Raising Gluten Free Flour (I used Coles brand)
1/2 Cup Almond Meal/Ground Almonds
3/4 Cup Caster Sugar (you can replace with natural granulated sweetener)
180g Butter (softened)
1 tsp Gluten Free Baking Powder
1 tsp Vanilla Extract
Handful of Chocolate Chips, dark, milk or white (I used Coles brand milk chocolate buttons)

TIPS:
Always check the ingredients when buying for gluten free recipes. Make sure they are 100% gluten free as you don’t want to poison yourself or others!

METHOD:
1) Cream together the softened butter, sugar and vanilla extract.
2) Combine the eggs one at a time.
3) Mix in the rest of the dry ingredients, adding the chocolate chips in last.
4) If you’re using a muffin tray, line the tray with a bit of butter or light cooking oil. Otherwise spoon your mixture into muffin or large cupcake cases.
5) Bake in the middle of the oven for around 12-15 minutes at 180°C.

TOP TIPS:
1) I always taste my batter. No, I don’t recommend that you do this since we are now encouraged to steer away from raw eggs, however I think it helps when you’re unsure if you’ve missed something or added in too much/too little of something.
2) Gluten free cake batter needs to be more moist than your standard cake batter. This is to ensure the cakes aren’t too dry and crumbly after baking. If your batter feels too thick, loosen it with a bit of milk. It should be a slightly thick batter but not too dry.
3) Fill your muffin/cupcake cases/trays to just over half-way if you’re planning on decorating your muffins. Filling to half way will ensure an even rise with a relatively flat top, perfect for icing!
4) Don’t add too much baking powder as the muffins may over-rise!
5) Bake in the middle of the oven. I find that even in fan ovens the top of the oven gets way hotter than the bottom. Cook in the middle and keep an eye on your muffins to make sure you don’t over-bake them (I always get distracted!)

TO DECORATE:
The main reason I didn’t make these muffins sugar-free was because I wanted to decorate them with icing and I haven’t quite mastered the sugar-free icing yet (to be honest I haven’t mastered the standard one either!)

Not too bad for a first attempt!

INGREDIENTS:
2-3 Cups Icing Sugar
1/3 Cup Butter
1 tsp Vanilla Extract
Drop of Natural Food Dye (I used blue and red)
Splash of Milk (if icing is too thick)

METHOD:
1) Sieve the icing sugar into a large bowl and combine with butter and vanilla extract.
2) Separate the icing into separate bowls and add food dye (I had a bowl of the basic white icing, a bowl of blue and a bowl of red).
3) Add the nozzle into your piping bag, then add your different coloured icing into sections, depending on how you want your icing to look. I did a stripe of white, stripe of blue and stripe of red (trying to keep the white in the middle to avoid purple!)
NOTE: You want your icing to be quite stiff to hold its shape!
4) Make sure your muffins are completely cooled then decorate your muffins as desired!

Try to keep your colours separate!

I made my icing way too soft so it didn’t hold its shape well at all! Try and make your icing quite hard if you want it to stay in shape on top of your muffins. Otherwise, the end result wasn’t too shabby and they tasted delicious!

My attempt at Union Jack icing!

Hope you all enjoyed watching the Royal Wedding! We certainly did 🙂

If you’ve got any top icing tips I’d love to hear them in the comments below!

Happy baking! 🙂

Annoying Misconceptions about Coeliac Disease

Being “gluten-free” and having Coeliac Disease are two completely different distinctions that people often fail to comprehend. Here’s some more annoying misconceptions about Coeliac Disease.

1. You’re on a ‘fad diet’.

via GIPHY

Yes I’m eating gluten-free. No it’s not by choice – why would it be?! All these people following a ‘fad’ diet that excludes gluten (without medical reasoning) have somewhat ruined the experience for those of us who don’t have the choice. Many food establishments that advertise ‘gluten-free’ aren’t Coeliac-friendly, because we’re just on fad diets too yeah? Erm NO!

2. Just a little bit won’t hurt.

via GIPHY

If I punched you just a little bit it won’t hurt, right? I can’t even count the amount of people that have said this to me, even my own family. Coeliac suffers shouldn’t be subjected to even the smallest amount of gluten, not even a crumb. Even if we don’t experience any immediate physical symptoms, the smallest traces of gluten can cause months of untold damage to our guts. Coeliac Disease is an immune response to gluten – yes, our immune systems literally attack our own guts if we eat gluten. The gut can then take years to fully repair itself which is why it’s so important for sufferers to remain on a strict gluten-free diet for the rest of their lives.

3. Getting ‘glutened’ is just like getting food poisoning.

via GIPHY

To the untold eye, yes. When a Coeliac consumes gluten they will appear to have the same symptoms as food poisoning, but it’s actually whole lot worse. Symptoms can differ from person to person, but usually consist of nausea shortly followed by vomiting, diarrhoea, horrific abdominal cramps for hours on end, followed by ‘brain fog’ and a general feeling of being completely worn out. As before, it’s a rapid immune response which can leave you susceptible to minor illnesses for a weeks after – not something that just disappears within 48 hours!

4. We ‘enjoy’ the gluten-free label.

via GIPHY

No-one enjoys having Coeliac Disease and not being able to eat gluten. There’s so many things we miss out on, so many times where we’ve been unable to find anything to eat or been caught out by something we thought was gluten-free. Speak to anyone with Coeliac Disease and they will name 5 things they miss about not being Coeliac in a microsecond. That’s not to say that we can’t enjoy life, enjoy food and have fun – it’s just a lot more difficult for us. We don’t enjoy being the awkward one at parties, or the one everyone feels sorry for when the restaurant doesn’t have any gluten free options. It’s not what you call ‘fun’!

5. Eating gluten-free is good for you.

via GIPHY

Well, it depends. If you eat gluten-free food and don’t include the gluten-free alternative products, I imagine the diet would be reasonably healthy. I mean, especially if you subtract all the takeaway meals and fast food stops you can no longer enjoy. However, many of the gluten-free alternative products are packed full of fat, sugar and oil (especially palm oil) to make up for taste and texture often lacking in gluten-free food. Next time you pick up a packet of gluten-free biscuits, check for yourself. Just because they’re located in the ‘health food’ isle, don’t make them healthy!

6. you’re gluten free? me too!

via GIPHY

Nah, don’t even. If you choose to eat gluten-free, we are definitely not on the same page. Not only do people with Coeliac Disease have no choice, we can’t just stroll into a restaurant claiming to be gluten-free and just happily sit down and eat. The same goes for the gluten-intolerant or wheat-intolerant who aren’t as sensitive to gluten and don’t have to worry about cross-contamination. What really grinds my gears is when a gluten-intolerant person complains about the lack of gluten-free options, then decides to eat gluten anyway and just ‘suffer the consequences’ for the sake of a doughnut. Go away!

7. We’re just being fussy

via GIPHY

OK, if you think that eating the slightest crumb doing untold damage to your gut is being fussy then see ya! Trust me, if we had a choice not to be ‘fussy’, we’d take it!

8. Eating gluten-free is expensive

via GIPHY

Yes, many of the gluten-free alternatives you find in supermarkets and specialist stores are more expensive, but eating gluten-free doesn’t have to be expensive. Compared to when I was diagnosed back in 2011, the price of gluten-free food has come down considerably. Many supermarkets now have an excellent range of own-brand gluten-free foods at half the price of other brands. Some supermarkets have better choice than others so it’s always worth shopping around and making the most of any special offers!

Life isn’t always a breeze, but we make do! What misconception about Coeliac Disease annoys you most?

Happy reading 🙂

Restaurant Review: The Wolfe, East Brisbane

Looking for a more decadent, celebratory fine-dining experience? The Wolfe is the ideal place!

Located on Stanley Street East, nestled in-between aged buildings, anyone would walk straight past this restaurant without even realising. Inside, however, The Wolfe’s dark wooden decor certainly makes an impact. Since we left the booking a little late, we were seated in the outdoor courtyard towards the rear of the main dining area. We were happy to be seated outside with the cooler air making for a more pleasant experience, even with the mosquitoes attacking my legs. Decorated with leafy greens, the courtyard was just as elegantly designed as the dining room, making you feel no less important that the interior diners, including the continual dedicated service throughout the evening.

Un petit appetizer

Since we booked and arrived at a later time, many of the menu items were already sold out (which shows just how fresh the produce is) including the oysters, much to my friend’s disappointment. However, we were greeted with some delicious (and dainty) appetizers whilst we scoured the menu. Many of the menu items were gluten-free, much to my delight, making my decision a lot more enjoyable – opposed to the usual experience of just choosing whatever is gluten-free! The menu is changed on a monthly basis, so don’t expect to find the same items I ordered below on the current menu!

I opted for the quail ballotine with red grapes and woodear mushrooms to start, wanting to experience new dishes that I could actually enjoy on my strict gluten-free diet.

Starter: Quail ballotine with red grapes woodear mushrooms

My first time eating quail, it was perfectly moist, tender and perfectly matched the red grapes and woodear mushrooms…and that sauce! Lately, I’ve been opting for more raw dishes to start, so having a cooked entree was a good choice to mix things up a bit. Next up, my main was another first for me – wagyu beef (and a sizeable portion of it too!)

Main: Wagyu beef with enoki mushrooms

When my main first arrived, I was a bit disappointed that I hadn’t ordered a side to go with it, but half-way through my plate I realised that it simply wasn’t needed. Once again the combination of flavours and the perfectly cooked steaks were to die for, leaving me wondering if I’ll ever be able to enjoy another steak again! And for dessert…

Dessert: Chocolate Mousse with Berry Sorbet

Anything chocolate is a winner to me, but this was just the most divine way to top off an amazing meal. The richness of the chocolate mousse was perfectly balanced by the tartness of the berry sorbet and the crunch of the white chocolate shards. Once again what looked like a small portion turned out to be just the right size for the dish. Whilst the dishes took a little while to arrive, it allowed time to relax and enjoy the atmosphere and good company. Unlike most restaurants, we weren’t rushed out at the end of our meals and the table service throughout deserved a 5 star alone.

I highly recommend the Wolfe for an evening of decadent dishes for a special occasion. Remember to book well in advance as the dining room fills quickly and perhaps book a little earlier in the evening to ensure you don’t miss out on some of the delicious fresh produce.

Happy eating! 🙂

Mount Barney Lower Portals Trek

This weekend we decided to embark on a slightly more intense trek and found that Mount Barney National Park had a range of different tracks on offer. Considering the drive to Mount Barney was going to take nearly 2 hours, we decided to embark on the 3 hour Lower Portals track and set off before 8am (we are still beginners after all!)

Driving down from Brisbane we planned to stop for our ritual pre-trek breakfast at Rathdowney on the Mount Lindsay highway. Just outside of the town centre is Rathlogan Grove with its very own Hilltop cafe nestled amongst the olive trees. The cafe is quite charming with its rural surrounds and small store selling a range of goods from country kitchen wares and boutique skincare to their very own olive oils and dressings (of which we purchased a few). Although their menu didn’t clearly state gluten-free options, they were more than happy to provide gluten-free bread which turned out to be of the best handmade variety.

Breakfast & Views from Hilltop Cafe, Rathlogan Grove

After fuelling up, we made our way to the start of the trek at the Lower Portals car park in Mount Barney National Park. As Upper Logan Road steadily transformed into a dirt track, we were baffled as to where the Lower Portals car park actually was and ended up at Yellow Pinch Reserve.

Upper Logan Road towards Mount Barney

At this point in time we had both lost mobile signal so we were without navigation. Luckily for us, there were some handy (though no very detailed) maps at the Yellow Pinch Reserve notice board and we discovered we’d somehow driven past Lower Portals road.

Mount Barney National Park Map

We eventually found Lower Portals car park (the sign for Lower Portals Road was obscured by a sign for Barney Creek Vineyard Cottages!) put on our hiking boots and headed out on the track. The Lower Portals track is a class 4 track (based on Australian standards) with a distance of 7.4km return – taking around 3 hours in all.

Lots of creeks and rocks to climb over

The track itself had a mixture of terrains, with some very steep inclines and a small amount of rock climbing at points. What started off as a fairly cloudy and cool day quickly turned into a very hot and humid one – add steep and uneven tracks in the mix and you’ve got yourself a recipe for a sweaty hike!

We were already worn out by the time we reached the first creek

Despite the intensity, there seemed to be a great mixture of people attempting the hike including young children and some elderly folks (who we were unsure were going to make it to the end!) Matt described some parts of the track as an ‘arid hellscape’ with the red-orange rocks and tree roots engulfing the steepest inclines. It was certainly a step up from our trek at Lake Wivenhoe!

Amongst the flora and fauna

After around 1 hour and 20 minutes of ups and downs we reached the creek at the end of the track (hurrah!). I was surprised that the creek was so clear and clean and began to regret not taking any swimwear with me (I was pretty hot and sweaty by this point!)

The first point of the creek – the water is so clear!

Although you can swim at the first point of the creek (the first part is surprisingly quieter), you have to jump over the stepping stones and clamber over some rocks on the other side to reach the more popular swimming holes.

The more popular swimming holes & sunbathing spots on the other side of the creek

Here we found congregations of families and friends eating picnics, enjoying a swim and sunbathing on the many rocks. After removing socks and shoes and dipping our feet into the water, we both decided that we probably wouldn’t have been swimming after all – the pool was freezing cold even despite the heat! Despite the large amount of people there, the creek had a rather relaxing vibe to it. We even saw a wild turtle milling around in the water, keeping its distance from the splashing children.

Well worth the trek!

Overall, the trek was quite intense in terms of the steep inclines, high humidity and temperatures, but thoroughly enjoyable all the same! The track provides an array of different scenery and terrains meaning you’ll never get bored of repetition and the creek at the end is just an added bonus! Ensure you take plenty of water, optional swimwear and perhaps a picnic to enjoy once you reach the creek. Expect to be out for at least 4 hours so remember your sunscreen and protective gear. Oh and bear in mind there’s little to no mobile phone signal so make sure you download your offline maps beforehand.

Have you recently completed a Mount Barney trek? We’d love to hear from you!

Happy hiking! 🙂

Trekking at Lake Wivenhoe

Determined to make the most of the weekends, I’ve been on a quest to find interesting treks and places to visit just outside of Brisbane city. This weekend, we decided to trek around Lake Wivenhoe and discover the nearby historic town of Esk.

Esk is a small countryside town north-west of Brisbane city, on the edge of the rather grand Lake Wivenhoe. Known for its charming cafes and antique stores, Esk reminisces of a by-gone era. Driving from Brisbane, we took the M2 then A17, the latter providing incredible views of Lake Wivenhoe as we made our way to Esk.

We decided to stop in Esk for breakfast before heading back to our trek (which we’d already driven past). We stumbled across Nash Gallery and Cafe, drawn in by its historic colonial architecture.

Nash Gallery & Cafe, Esk

The cafe had a few gluten free options on the menu but I got distracted by the mouth-watering fresh gluten-free cakes on display at the counter.

Nash Gallery & Cafe Lunch Menu

I opted for a flourless, gluten-free chocolate cake and a chai latte with almond milk since I wasn’t overly hungry. The flourless cake was decadent, chocolately and moist just as it should be. They also had gluten-free chocolate brownies and a pear and pistachio cake amongst others!

Delicious flourless gluten-free chocolate cake

We then headed south to Lake Winvehoe for the Wivenhoe Hill trek. The trek consists of 4 trails: black, blue, red and white. We decided that a 9km trek would be sufficient for the day, so we started on the blue trail, planning to make our way back to the car park via the black trail.

Map of the Wivenhoe Hill trails (taken at the end of the Blue Trail)

The beginning of the Blue Trail was a little odd – a seemingly abandoned tarmac road that eventually looped back on itself – turning into a dead end. We then realised that the trail continued up and away from the road and into dense bushland.

Beginning of the Blue Trail from the car park

This is where the Blue Trail got a bit more difficult. You could definitely tell that the trail we really designed for people on horses more than people on foot but it made for an interesting trek all the same.

This is more like it!

Overgrown trails, an array of wild birds and a challenging route proved for an interesting trek on the Blue Trail. The only disappointment was the lack of views over Lake Wivenhoe. The trail got so close to the waters edge and yet the views of the lake were constantly hidden by foliage. If you’re looking for picturesque views of the lake, this trek isn’t for you!

The only view of Lake Wivenhoe from the trail

The Black Trail returned to the abandoned tarmac road which made for a rather hot return journey. Although the majority of the Blue Trail was under the cover of the trees, the Black Trail was open to the elements and the harsh heat of the midday sun – remember your hat, sunscreen and water!

Driving over the dam at Lake Wivenhoe – finally, views of the lake!

If you’re looking for a challenging and quiet trek, the Wivenhoe Hill trails are a good start, with an array of different trails and distances to mix and match. Just bear in mind the lack of facilities and the difficult nature of some of the trails. If you’re simply after an enjoyable day out not too far from Brisbane city, we highly recommend visiting Esk and Lake Wivenhoe, even if its just for the views.

Have you recently been on any other treks around Lake Wivenhoe? I’d love to hear any recommendations!

Happy reading! 🙂